
Getting started with the Microsoft Teams Framework (TeamsFx)
A couple of months back, Microsoft started talking about a new way to create applications for Microsoft Teams. Those efforts got different names and with previous and betas and all their different names, it’s probably best to quote the current introduction from the actual GitHub repo of the project.
Microsoft Teams Framework is a library encapsulating common functionality and integration patterns (like simplified access to Microsoft Identity) for developers building apps for Microsoft Teams. The Teams Developer Platform offers a collection of solutions for Teams developers:
- IDE extensions for Visual Studio and Visual Studio Code named “Teams Toolkit”
- Docs, samples
- Code libraries including Teams Framework teamsfx and the Teams Client Library teams-js
- A command line tool teamsfx for terminal users, automation, and CI
This post should help you to get you started with your first Teams application in Blazor. As every one of us has a very own way of learning, I’m happy to offer you either the video explaining the approach in roughly 13 minutes, or the blog post, that tries to cover the same ground, but with text and images. Whatever you choose, I’ll hope you enjoy your option, and please keep the feedback coming!
Why Blazor makes the difference
What got my attention was of course the Visual Studio part of the early messaging. At Build2021 it was clear that there will be an option to create applications for Teams based on Blazor. For everyone not familiar with Blazor and with a dev background, think SPA or front end dev work with .NET instead of JavaScript. Blazor gets a lot of hype for the WASM (Web Assembly) capabilities, but for me, not needing to write JavaScript code is already a huge advantage.
Please, don’t take that as some decision or view that should be followed like a religion. I know some people out there see it that way. If that’s OK for them, be my guest, but for me, it’s a point in time decision of a developer framework or toolchain. Things will change in the future again, for sure. So pick what you need to finish the job and try to learn as much as possible about the tool you choose. In the end, the question is if your users are happy with your app, that’s in my opinion way more important than the dev stack.
Anyways, for this article and blog, we will focus on the .NET side of the house, as I just can’t write JavaScript without the constant fear of breaking my fingers every 10 lines of code. And there is only me to blame for that, as I never invested enough time to really dig deep and learn it from A to Z.
Looking back over some smaller projects and what I was able to achieve in Blazor, I’m more than happy that Microsoft invests also in Blazor in M365.
TeamsFx in Visual Studio or Teams Toolkit v2
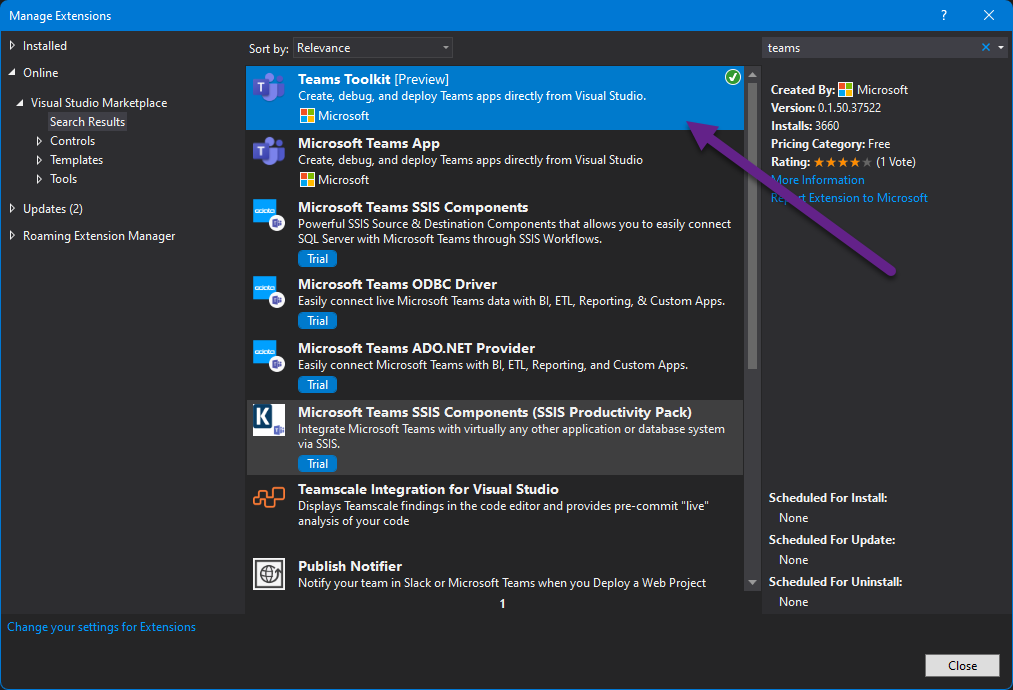
If you open up Visual Studio 2019 and search for Teams in the Extension menu, you will find two different extensions. We are focusing on the one named “Teams Toolkit [Preview]”. And yes, this library is still in preview and has some rough edges. That means you should not use that in production or start creating support tickets because things break. It’s still in development and not released yet, so better be careful how you use it! Go ahead, install the extension and let’s have a look at what we get!
First Teams template
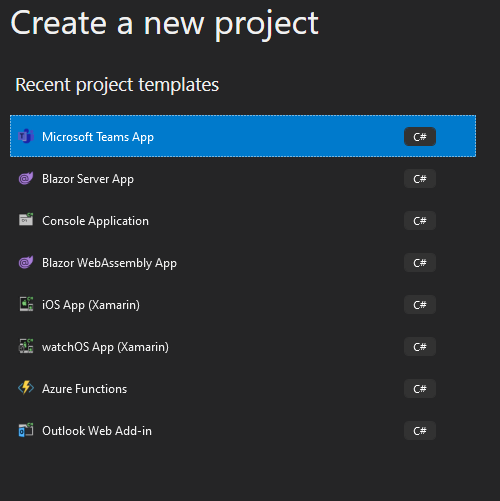
After installing the extension and restarting Visual Studio 2019, create a new project and select “Microsoft Teams App”.
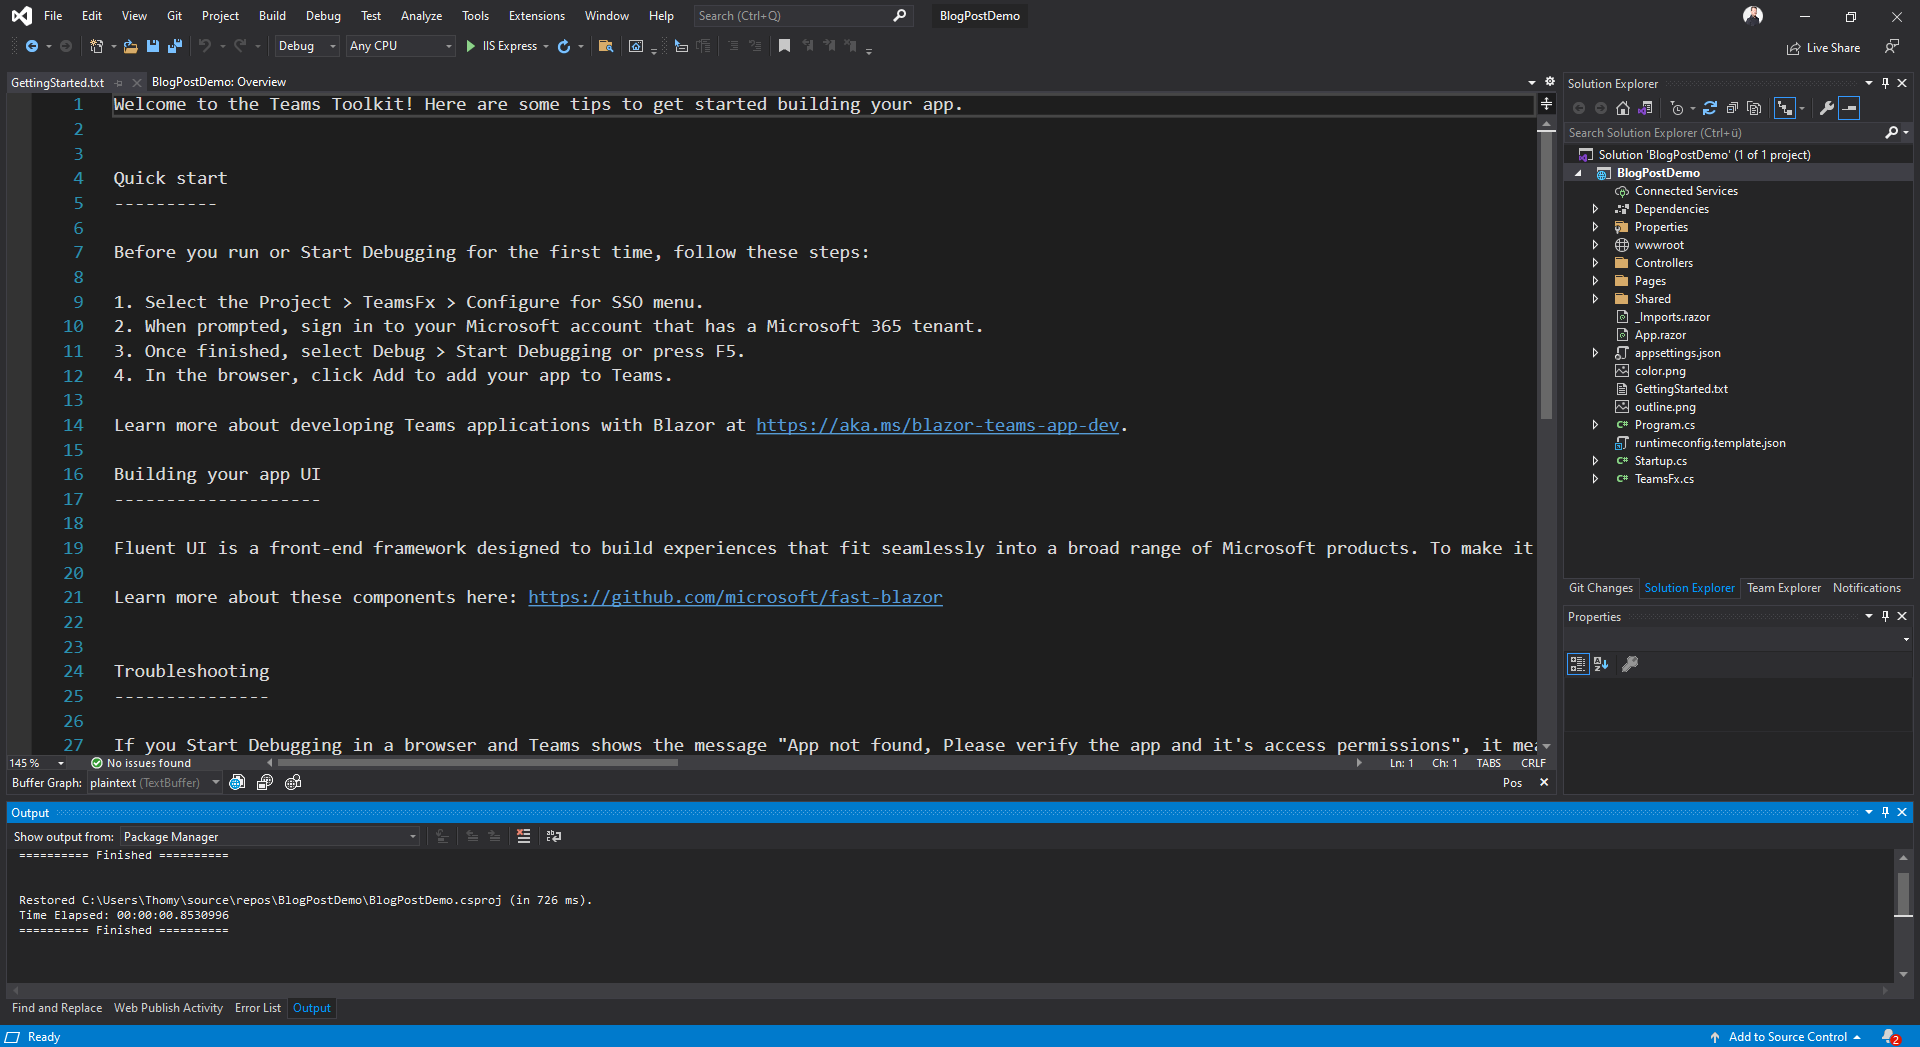
The wizard asks you about your project and application name. Please make sure you remember those names/variables because we will discuss their references later on. Visual Studio now created a new Blazor based project and opens the GettingStarted.txt file with a four-point list telling you what you should do to be able to “consume the F5 experience”. In other words, that’s what you need to do, to get the application up and running. Please select a developer or test account and tenant during the process and make sure you have at least some permission in the Azure portal of that tenant, so you can manipulate the generated Azure AD app, and it’s permissions later on.
Following points 1 and 2 you should see something like this in your output window in VS 2019:
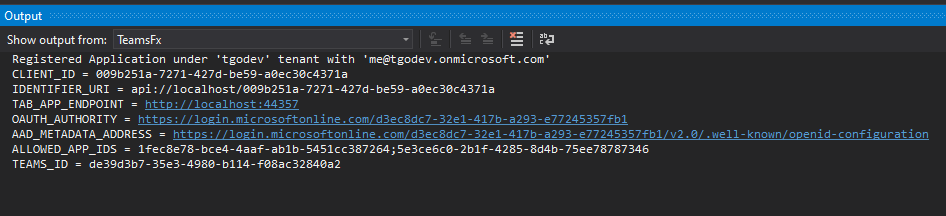
The Teams Toolkit took the credentials you provided and created a couple of things in the background. First, it created a Teams app definition and uploaded it to the Teams developer portal of your tenant. Second, it created an Azure AD application, assigned some basic permissions and “allowed app ids” and configured your Teams project to use said Azure AD app in your solution. Open both portals and make sure you find the entry you just created by configuring SSO for your application.
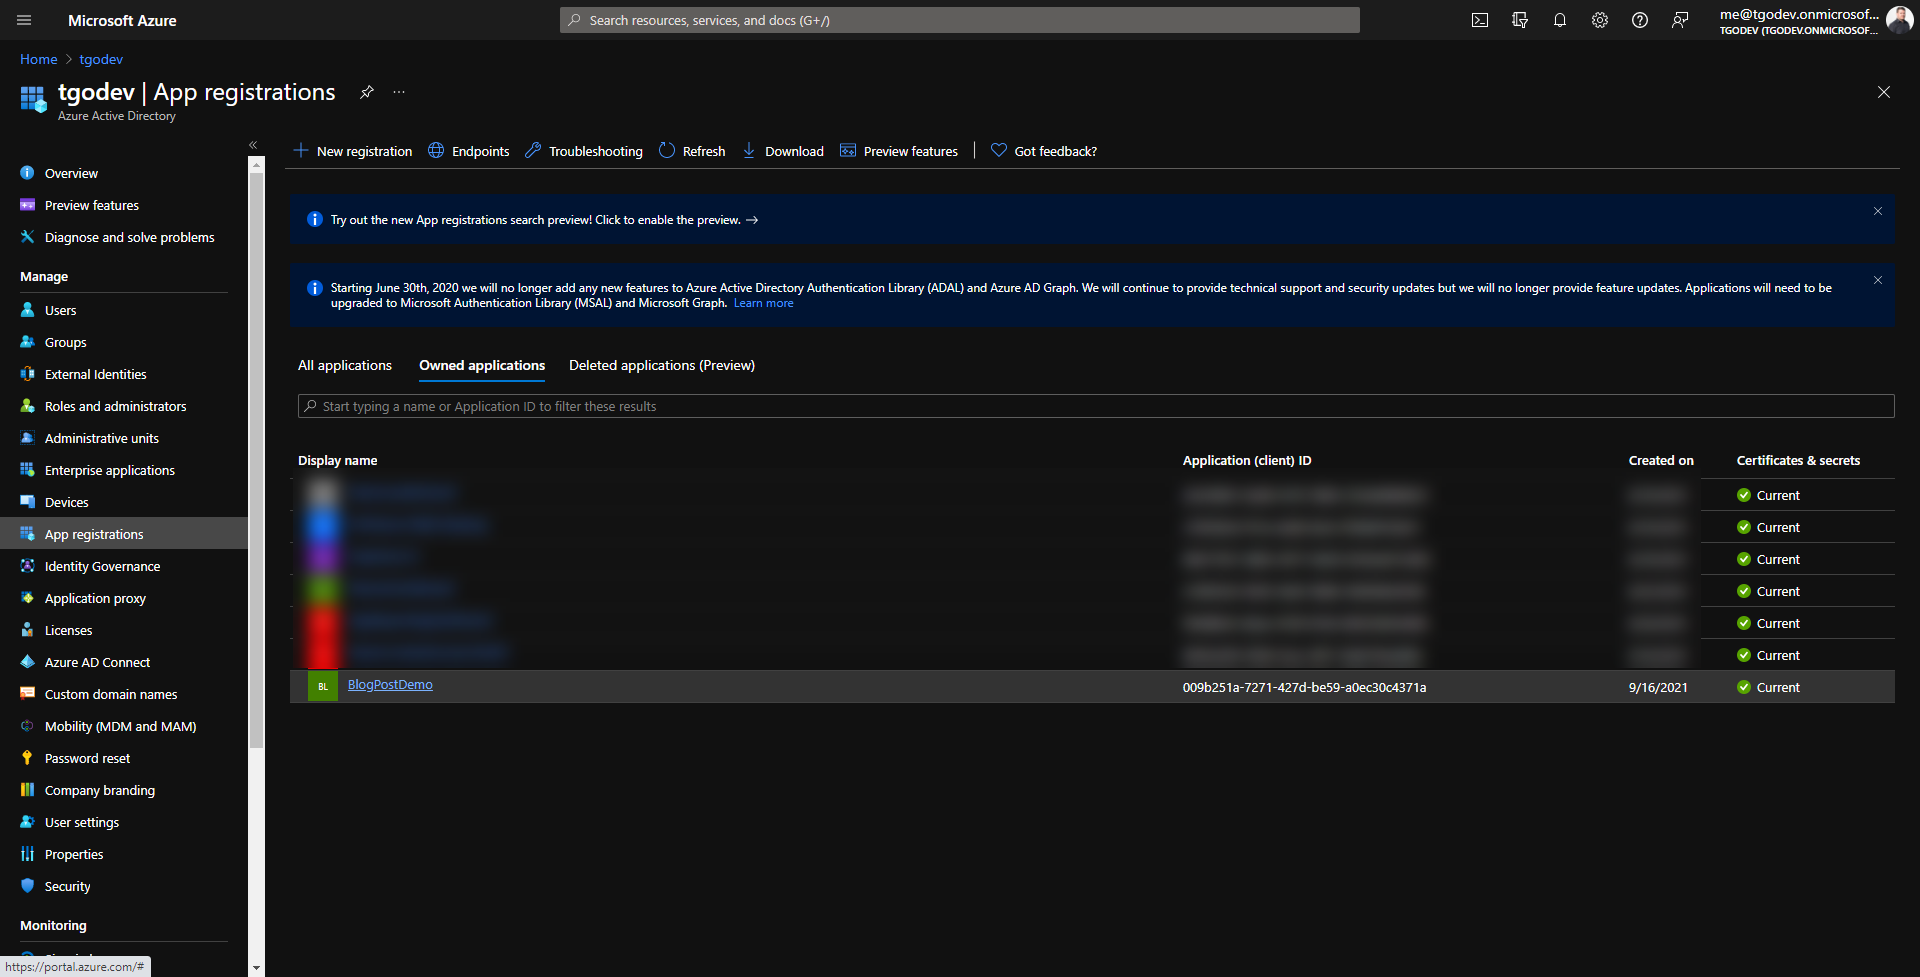
And:
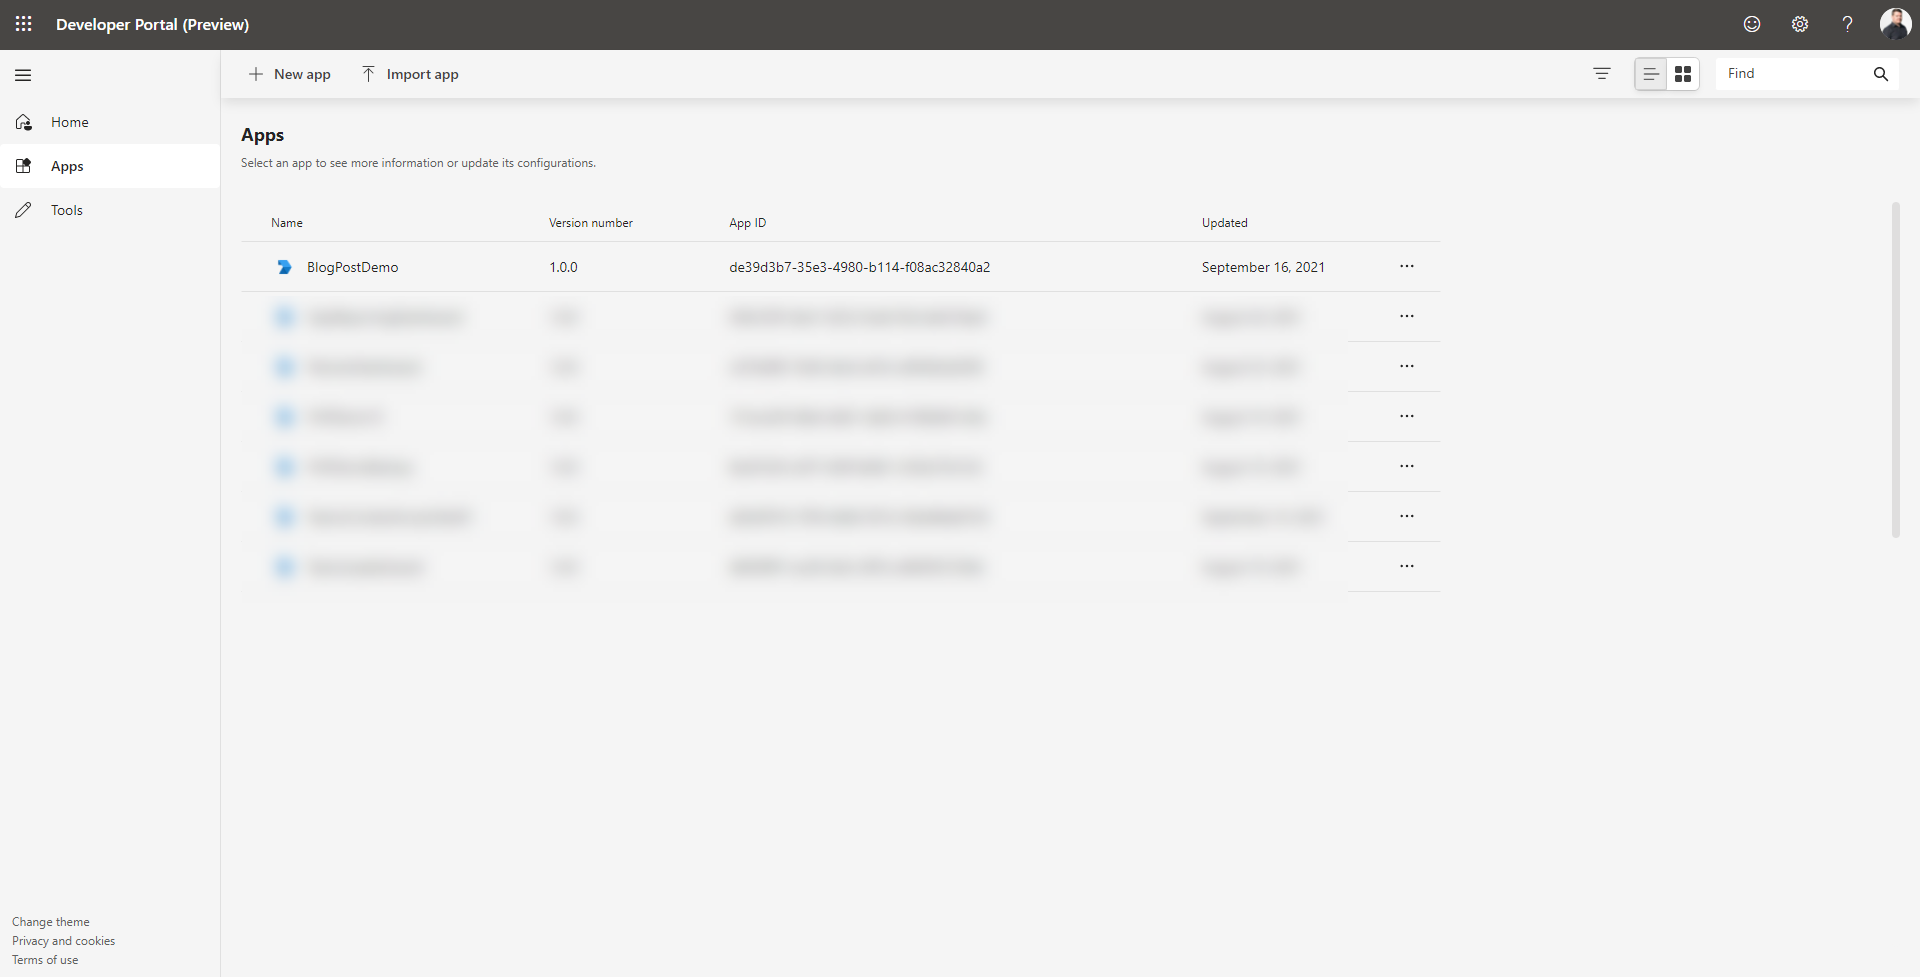
You should be able to recognize the values you provided during the wizard in both portals and most probably you should think about your naming convention in the future just to make sure things are consistent and easily identified in all use cases: Visual Studio Solution, Azure AD App and Teams Developer portal.
Start your application - Press F5
If you were able to follow along so far and no installation or configuration hiccups occurred, go back to Visual Studio and press F5. It will take a couple of seconds, but VS will build the application and start your local IIS instance to serve your Blazor application. Visual Studio should open your browser and point you to the Teams web application of the tenant your SSO account belongs to.
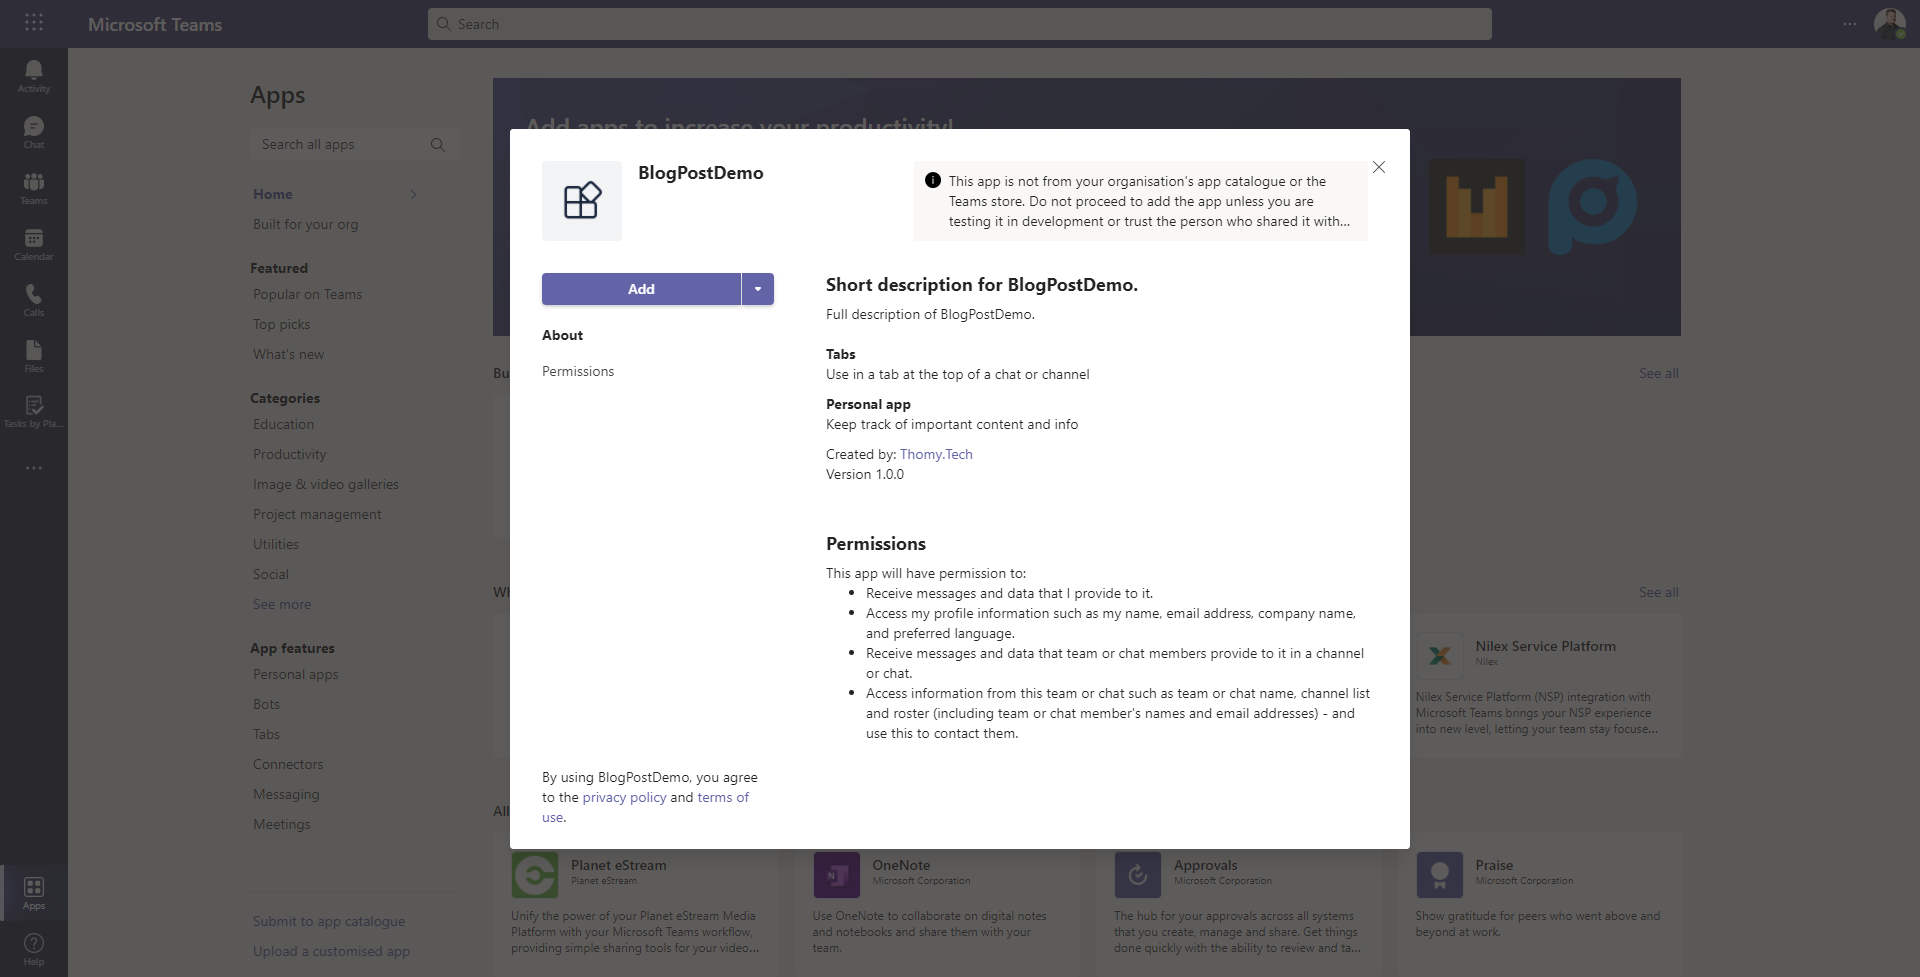
On the installation screen, click on “Add”, and after a couple of seconds, you should see your first demo application up and running in a private Teams Tab.
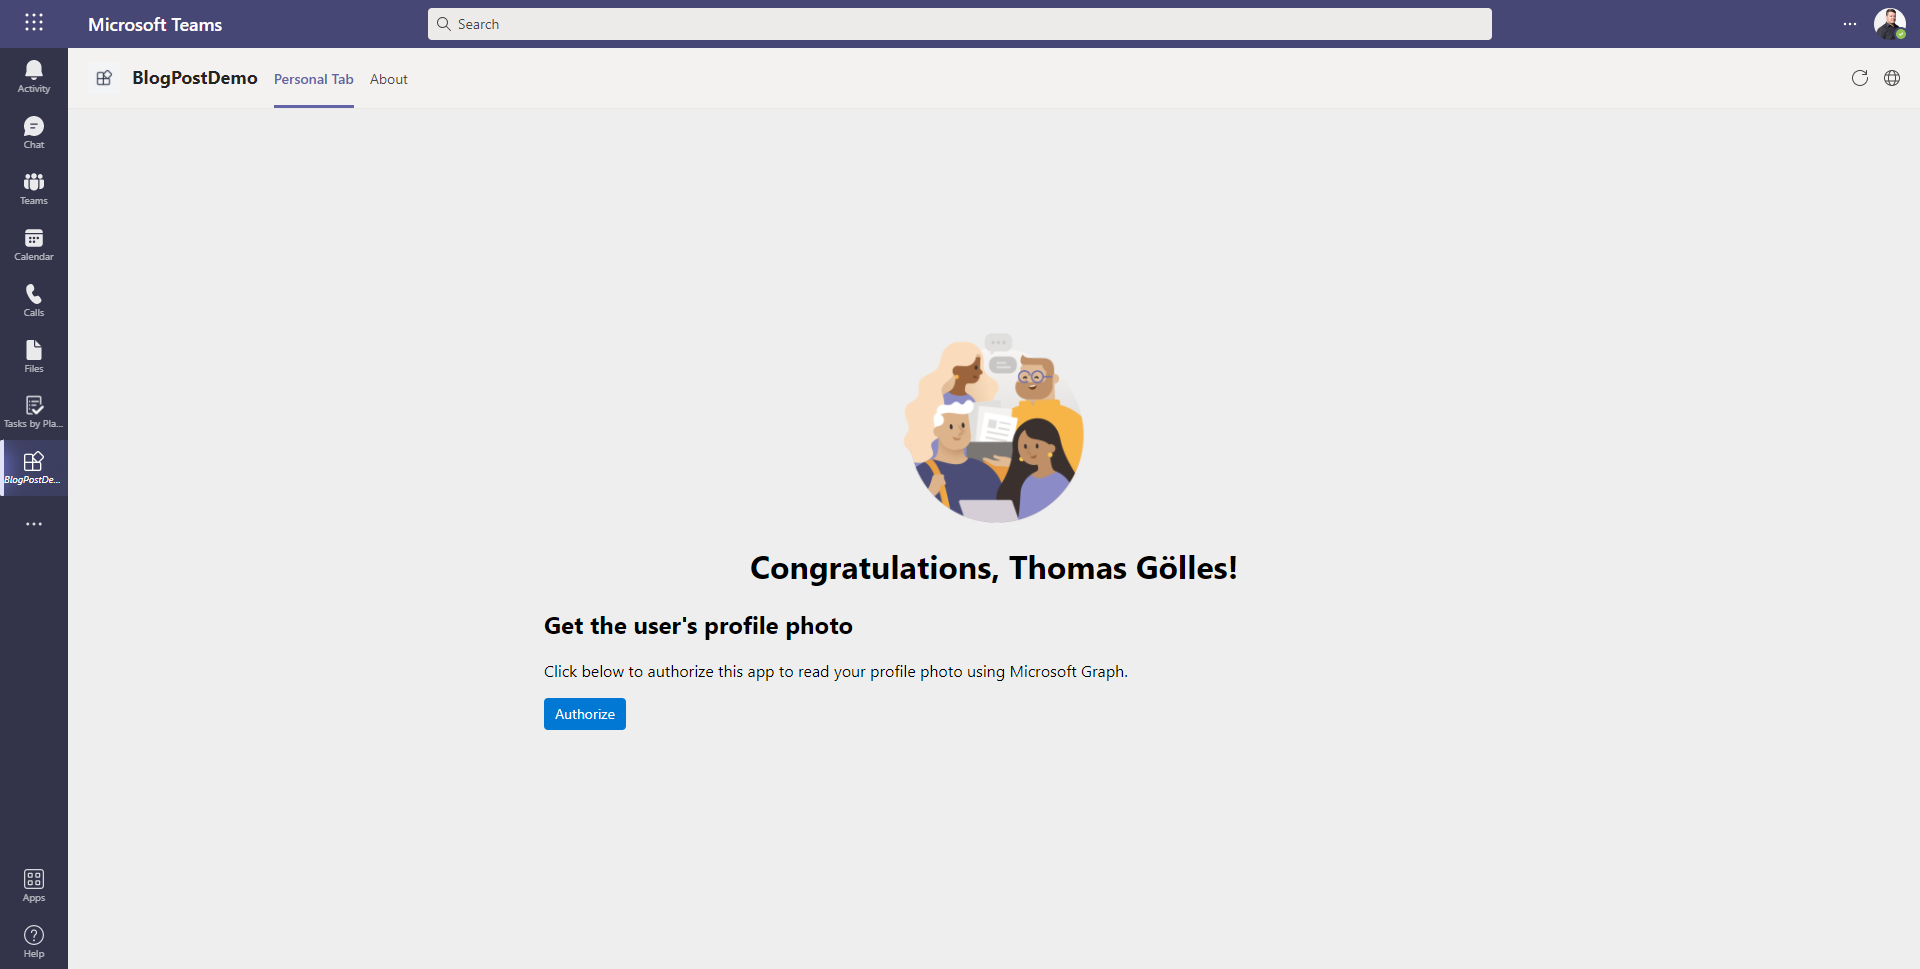
Congratulations, you just created your first Blazor application for Teams!
Exploring the demo application
Looking on the screen, you see the “Authorize” button. That button will create a Microsoft Graph service client and request the profile picture of your developer account. To follow along, open the Tab.razor component in the “Pages” folder of the project and look at lines 86 to 88.

We won’t go into details of the implementation, but the GraphClient is a regular client from the .NET SDK. The “magic” of the library/template comes from the “TeamsFx” part and how it creates that client for you.
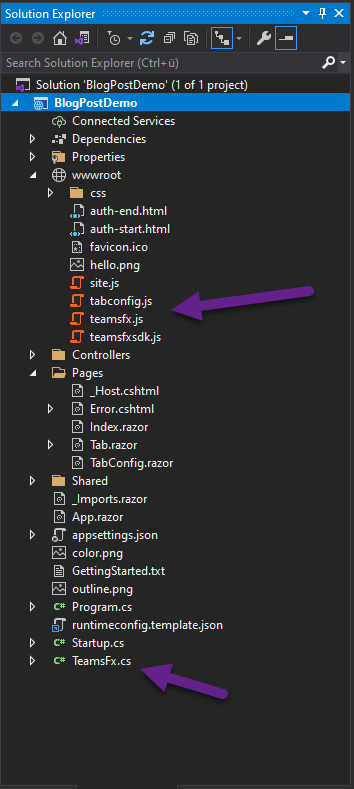
Not sure that my analogy is 100% technically correct, but what TeamsFx does is, it creates JavaScript wrappers for the Teams JavaScript SDK and makes them accessible by using the built-in JS interop features of Blazor. In the TeamsFx.cs file, you can find the C# part and in the wwwroot folder, you find the JavaScript files that hold the needed glue code to be able to communicate with the Teams SDK.
From a high-level perspective, that’s easy to understand, but the devil of course is in the details. I tried to create something similar by using the Microsoft Graph Toolkit, and its auth components in combination with Blazor JS interop. It worked, but as soon as you reach the point of token lifecycle it gets complicated, or let’s rephrase that, it just gets more serious, and you need to be very careful with your decisions, especially when dealing with access and refresh tokens.
If you want to explore the implementation just work your way through the code and try to understand how the app gets your bearer token and how the GraphClient gets created. If you want to extend the demo example have a look at https://github.com/thomyg/PnPDemo190821Backup. That just counts all the teams your user is a member of. But it already means that you need to add permissions to your Azure AD application, as the basic ones the Toolkit created aren’t enough to iterate through all your Teams.
As this post just is an entry guide to the world of TeamsFx we will stop right here to not make it too complicated right from the beginning. Thank you for following through and cu next time!
Enjoyed this post? Let's connect on LinkedIn:
Follow on LinkedIn →
